Corporate

Staying Vigilant During COVID-19

Staying-Vigilant-During-COVID-19

The world is facing an issue of enormous scale and importance. With the ongoing spread of COVID-19 and the incredible speed at which things are changing around us, Arlon’s top priority is the health and safety of our employees, partners, and community. Guided by the Center for Disease Control and Prevention (CDC) and local health officials, we are preparing and taking action for all possible scenarios to ensure we have the right plans and resources in place. Proactively, we are focused on the following:

Health and Safety

Our dedicated task force has put in place immediate risk reduction protocols for our employees such as social distancing, halting all non-essential business travel, canceling events and attendance at upcoming trade shows, offering flexible work from home policies and extended paid sick leave, and implementing a stringent office cleaning and hygiene procedures. We are communicating regularly with our employees to keep them informed as the situation continues to develop.

Partner Support

As we temporarily halt business travel to reduce exposure to our employees, we remain connected and productive during this challenging time. We can support you and your customers using phone, email, and live chat.

Continuity of Supply

Our Placentia, CA and Weifang, China factories remain active as we keep the safety of our operational employees top of mind. Additionally, our suppliers are working with us to mitigate any delays that might occur with the evolving situation. To date, we have not experienced any delays in our production.

We’re committed to being both responsive and responsible, navigating these times with everyone’s safety in mind.

Sincerely,

Chad Russell – President, Americas

Share This:

Read More
Vehicle Applications

Boat & Watercraft Wrap Applications

Vinyl wraps have become increasingly popular on boats and watercraft’s, making them the everyday option over paint.  When comparing the cost of painting, a boat wrap will save you time, are long-lasting, and a fraction of the price.

With no surprise installing on a boat or watercraft is very different from installing on a vehicle. If you’re planning on wrapping one of these, take a moment to read our current list of best practices ensure you’re on the right track.

Boat wrapped in DPF 6100XLP
Wrapped by Paul Oliver of Anchored Designs using DPF 6100XLP

Before we jump into the best practices, let’s break down the benefits.

Benefits of a Boat Wrap

Customization: Whether you’re promoting your business or looking to stand out, the customization options are endless.

Ease: Unlike paint, if your vinyl wrap gets scratched, you can replace the wrap reasonably quickly. 

Eco-Friendly:  Marine paints are toxic to marine life; making vinyl boat wraps the effective eco-friendly alternative.

Value: If the time comes of reselling your boat that has a custom wrap, the wrap can be easily changed when sold.  Your wrap will add value by saving the future owner a costly paint job.

Boat Wrapped in SLX Cast Wrap
Wrapped by Nukem Graphics using SLX® Cast Wrap

Best Practices

Measure Twice:  Unlike vehicles, boats and watercraft’s don’t have easy to find templates and have sharp edges. If you can’t find a template for your boat, be sure to take accurate measurements. 

Clean, Clean, Clean: Always clean and prep any surface before installing vinyl. Clean your boat or watercraft by following the steps found here on Perfecting Your Vehicle Prep.

Thick Overlaminate : Use a 2-mil (50 micron) cast overlaminate for max abrasion resistance; a thicker overlaminate will protect the vinyl from being torn on small items found in the water. 

Over-lap Seams:  At the front of the watercraft or boat, over-lap the two seams of the vinyl by one inch. Overlapping the seam that gets the most wear and tear will help prolong your wrap and leave less room for lifting.  

Waterline: Vinyl is relatively resilient, but it can be damaged if kept in water 24/7, ensure the longevity of your boat wrap by keeping it one inch above the waterline.

Boat wrapped with SLX Cast Wrap
Wrapped by Nukem Graphics using SLX® Cast Wrap

From boats to jet-skis, stand out on the water this summer with an eye-catching vinyl wrap. 

Share This:

Read More
Digital Printing Wall Applications

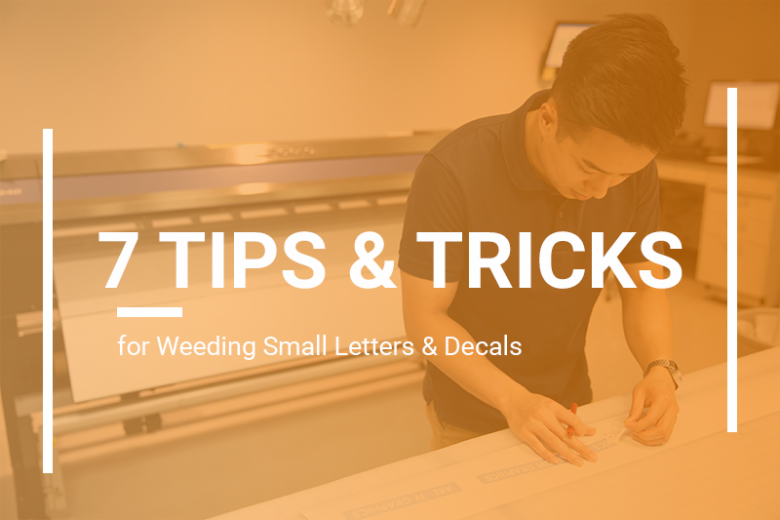
7 Easy Tips & Tricks for Weeding Small Letters & Decals

7 Tips and Tricks - Weeding Letters and Decals

Do you know the hardest part of making small decals and letters? Weeding!

If you are not familiar with weeding, it is removing all excess material from any decal or graphics that are cut-to-shape. Weeding small letters and decals can be a difficult task, but learning how to weed small letters and decals is crucial knowledge to have in the sign industry.

Here’s a rundown of our best tips whether you’re looking to take a design to the next level or need a refresher on weeding small letter and decals follow these tips and tricks below.

1. You need the proper tools, having the right tools will make your weeding a breeze. Our technical experts agreed that the YelloHook from YelloTools is the perfect addition to any tool kit.

Man weeding letters

2. Choose the correct vinyl with a tight liner release. A firm liner release ensures that small decals stay down during weeding, and allows you to weed with greater confidence and speed. Arlon recommends all of our cut graphics, and for print, we recommend DPF 6000RP White.

3. Check on your machine; confirm that your blade is in pristine condition. Using a dull blade will lead to poorly cut decals and make the weeding process very difficult.

4. Before starting your job, perform a depth cut test. Running a cut test ensures that the vinyl cuts thoroughly and that the decal is not attached to the excess material.

Pressing a button on a weeding machine

5. Weed directly after cutting, waiting too long to weed after cutting will allow the adhesive to flow back, causing the design to lift with the excess vinyl.

6. Try your best to keep your fonts simple; try using Sans Serif fonts. The sharper the edges on a font, the longer your weeding process will be.

Hands weeding a white vinyl

7. All of these tips are important to the weeding process, but it all comes back to one thing, patience. Take your time when weeding small decals and letters, essential but straightforward, weeding is a time-consuming task that is done best when you’re taking your time.

What are your favorite tips and tricks for weeding small letters? Let us know in the comments below.

Share This:

Read More
Wall Applications

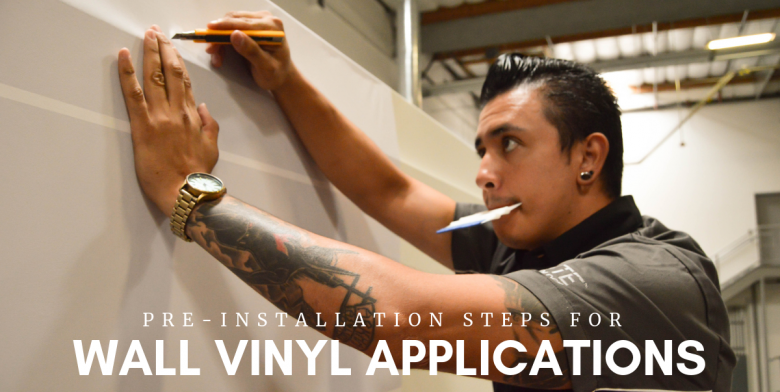
Pre-Installation Steps for Wall Vinyl Applications

With ease of application and the ability to turn a plain wall into a memorable display, digital printable vinyl has become the new decorating trend for interior and exterior walls. Wall installation may seem straight forward, but wall graphics come with a unique set of challenges. Take the below pre-installation steps into account to help ensure your next wall installation is a success.

Surface Preparation

Before using a vinyl to wall compatibility test it’s important to guarantee that the surface is free of loose dirt and particles; brush off all spider webs, remove aggregate or dirt from the grout lines and wall with a broom. For interior walls, clean off all the loose dirt with a wet low-lint towel and use Isopropyl alcohol to wipe the wall down. Taking this step will make for a clean slate to conduct a compatibility test.

Pre-installation tip: Brush off all spider webs, remove aggregate or dirt from the grout lines and wall with a broom.

The Importance of a Wall/Paint Compatibility Test

There isn’t a one size fits all for wall vinyl. With hundreds of different surfaces, it’s important to conduct a site survey before deciding if the wall can be wrapped and what vinyl you need to use.

After determining that the integrity of the wall is solid, the next step is to identify the type of paint on the wall. Details to consider for this step are: Is the paint on the wall compatible with the vinyl that will be applied? How long has the paint been on the wall? How many layers of paint are there? During the application, will the vinyl peel off any paint if repositioning is needed? These are all important points to consider since most of the low or zero VOC paints or all-in-one paint and are no longer compatible with most PSA films due to the additives that are added in the paint formulation.

After the wall compatibility test you'll be ready to install.

Out Gassing the Printed Film Prior to Lamination

If the film is printed with solvent or eco-solvent based inks, allow the film to outgas for 24 hours prior to lamination and installation. Trapped solvent in the film will make the vinyl film soft making it more difficult to install. Trapped solvent will also impact the adhesive bond strength to the wall.

Using the Right Tools

For installing wall wraps we recommended using a heat gun, extension cords, cutting blades, RollePros, and an IR thermometer.

Pre-installation tip: We recommended using a heat gun, extension cords, cutting blades, RollePros, and an IR thermometer

No matter what the deadline is for a project, don’t rush; take all the pre-installation steps to ensure your next wall installation will be a success.

Share This:

Read More
Digital Printing

Print Profile FAQ’s

Printer profiles are used daily in a print shop to achieve the highest quality color prints, and they play a significant role in the success of your project. Each vinyl manufacturer has different gloss levels and white points that affect the color of your graphics, meaning that even with the best print profile it’s important to make sure you are working with the best product.  With companies like Arlon providing profiles for most printers, you would think you have all your bases covered, right? Not exactly! To help when you run into any roadblocks when creating print profile we’ve answered some of our frequently asked questions.

1. Why is an ICC profile important for printing?

ICC profiles provide accurate color, optimized ink linearization, and printer heat settings. Without the correct media profile, the media may get overloaded with ink, head strikes may occur during printing from temperature being too high or large of a gradient between the heat zones, or an unnatural color may arise.

Printer Profiles: Configuration

2. Why is ink configuration important?

Printer manufacturers design their printers to be able to run 4 colors (CMYK), 6 colors (CMYKLcLm), 7 colors (CMYKLcLmLk) or more and because of this, each ink configuration requires its own unique profile on the printer.

3. What is the difference between 6, 8, and 12 pass?

A 6 pass profile will require the print head to laterally travel 6 times to print 1 linear inch. Lower pass numbers tend to lead to lower resolution and faster printing speed. This means that a higher pass number, like a 12 pass, will provide higher resolution but slower print speed.

Printer Profiles: Checking PassesArlon’s Tech Service Engineer Chi Chan checking the pass of the printer

4. What pass should I choose when printing?

– 4-6 passes are best used when printing a banner.
– 8-12 passes can be used when printing for a car wrap and canvas printing.
– 12 passes and higher are great for backlit signage as it needs a high ink load.

5. What is the general temperature for vinyl regardless of what printer?

In general pre-heat: 96.8°F -104°F (36°C-40°C), Printer: 100.4°F – 104°F (38°C-40°C), Post heat: 122°F- 131°F (50°C-55°C).

6. What happens when the heater setting on a printer is too high?

Latex: Blisters can develop on the vinyl surface; print quality can also be reduced.
Solvent: Waffling can cause risky print head strikes and damage.

Printer Profiles Problem: Blistering under High HeatBlistering occurs when a heater setting on a printer is too high.

If you’re ever questioning what print profile to use check out Arlon’s ICC Profile Page and if you need help unloading a profile, wrapitright.com has videos for several RIP softwares and printers.

Share This:

Read More
Digital Printing Events Manufacturing Vehicle Applications

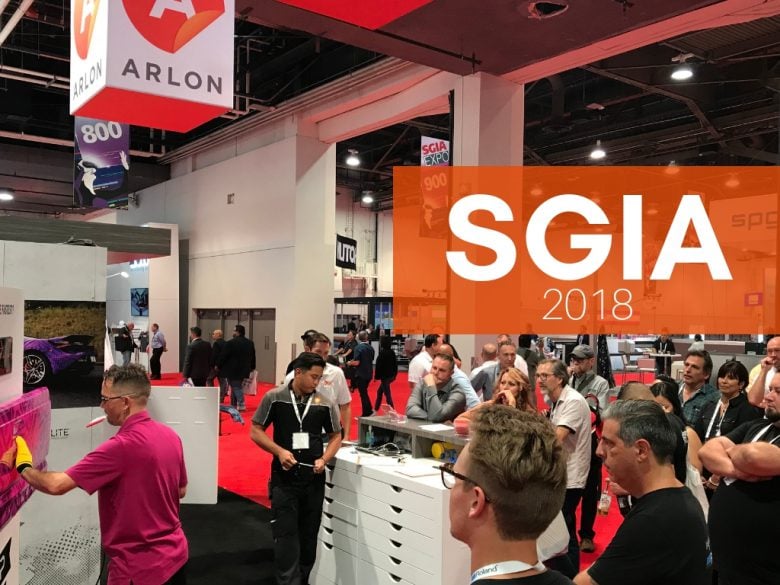
Arlon Provides an Interactive Experience at SGIA 2018

A huge thank you to all that visited our booth at SGIA 2018 Las Vegas, NV! This year the show had more than 25,000 registered attendees with a sold-out Expo floor. The aisles were filled continuously with attendees excited to see the latest sign and graphics technology.  Arlon had a very successful show, and in case you couldn’t make it here is what you missed.

Attendees flocked to the Arlon booth to get hands-on experience with the newest FLITE Technology™ products, SLX™ Cast Wrap and IllumiNITE Wrap™. During the show, the booth was busy with people participating and watching the Wrap Dash. Installers raced against the clock installing SLX Cast Wrap on a truck tailgate and with no surprise the ease of installation that FLITE Technology provides had participants wrapping at an average time of 6:45.

The fastest Wrap Dash time was set by Eric Peixoto of Incognito Wraps

Arlon’s Marketing Director of the Americas, Nicole Witt noted the wrap dash was a great success saying, “We wanted to create a competitive, yet exciting challenge that would attract talented installers of all levels to get hands-on with SLX Cast Wrap.” She went on to say, “We were thrilled with the engagement and buzz this created at the SGIA Show.”

Attendees gathering to watch the Wrap Dash Challenge

In addition to the Wrap Dash, attendees were lined up to get their chance to take a quick tour in the Dark Room Showcase. Visitors were able to experience the vibrant nighttime effects that IllumiNITE Wrap and R108 Conspicuity Tape can have together in adding impressions to corporate branding while keeping safety top of mind.

Other highlights included our wrap experts Matt Braswell and Louie Calma holding daily wrap demonstrations showcasing best practices for a successful installation using Arlon products. Arlon Sales Representatives we’re seen throughout the booth providing knowledge and details on all Arlon products.

Technical Sales team member Matt Braswell showing the benefits of IllumiNITE Wrap™

Overall, this show had fantastic energy. Arlon’s booth was a success in providing attendees with an interactive experience. From the Wrap Dash and the Dark Room Showcase to in-booth demonstrations, Arlon brought a fresh feel to the SGIA tradeshow.

Share This:

Read More
Vehicle Applications

Perfecting Your Vehicle Prep

Perfecting Your Vehicle Prep

One of the most common mistakes when installing vinyl on a vehicle is not taking the time to prep your surface. A vehicle that isn’t properly prepped can compromise the adhesive bond and ultimately cause failure in your application. We’ve outlined some tips to help you through the important process of vehicle prep!

While it can be time-consuming, following the steps below will help create a perfect vinyl wrap on your vehicle. This will take your wrapping game to the next level and also help prevent damage.

Vehicle Prep Perfection

Washing

The first step in prepping for the perfect vehicle wrap is washing your vehicle to remove any wax and debris. Wax will affect the adhesive bond on vinyl and not allow the vinyl to properly stay down. Handwashing is the most thorough way to ensure all areas and surfaces of the vehicle have been properly cleaned.

Vehicle Prep - Washing the Car

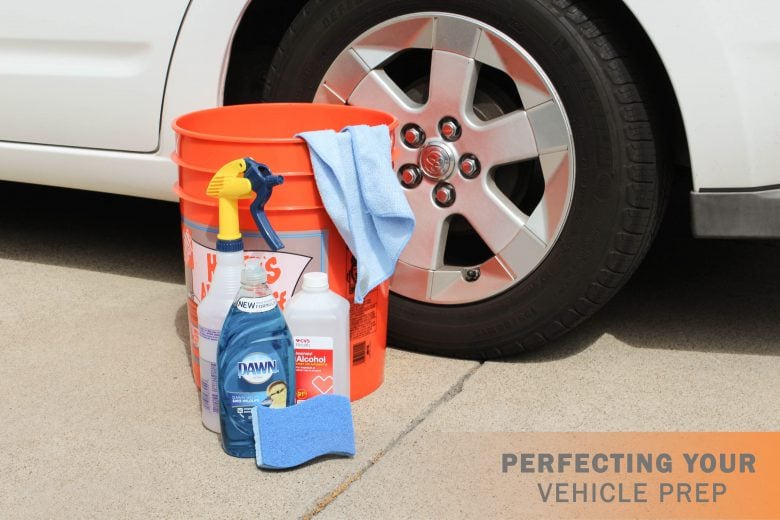
To start the process we recommend using water and a simple degreaser, like dawn dish soap; 1 TBS for every two gallons of water should do the trick. Using a microfiber towel wash the entire vehicle properly.

Trouble Spots

Corners, cracks, and weather trims are all areas that can be tricky to get to and require extra attention. Using the rough side of a sponge on these areas will help remove hidden debris and wax.

Vehicle Prep - Trouble Spots

Cleaning Solution

Even after a hand wash, the surface is not completely cleaned.  The last step will be going over the vehicle surfaces with a clean lint-free cloth and isopropyl alcohol (IPA). Using a spray bottle, fill this with equal parts IPA and water. Spray the mixture directly on your substrate and wipe down immediately with your lint-free cloth. Wiping the vehicle down with this mixture will completely clean the surface of any leftover soap and wax.

Vehicle Prep - Cleaning Solution

Last Steps

After the wash, dry every part of the vehicle with a microfiber cloth. Once your vehicle is 100% dry, you can start your install with confidence.

Rushing through the vehicle prep can have implications on the success of your wrap so it’s important to never skip through this process!

Share This:

Read More
Digital Printing Manufacturing Vehicle Applications

Caring for Your Vehicle Wrap in Hot Weather

Hot weather wraps need extra care

Summer months are known for having the longest and hottest days of the year. During this time, the amount of UV exposure increases significantly. An extended amount of UV exposure is the greatest enemy to your vehicle wrap. In these hot weather months, your vehicle is going to be susceptible to damage caused by environmental factors. Protect your investment from damage by following the steps below:

What does Arlon do for Weather Testing?

When developing a product, Arlon tests products in extreme climates.  We test new products in hot weather climates like Florida, California, and Arizona. During the testing process, we are constantly checking for browning, shrinking, and cracking. This is done to ensure that when you use our film your application will withstand the high temperatures.

What can you do to Protect Your Vehicle Wrap?

  1. Keep Your vehicle Out of Direct Sunlight
  • After a period of time, the rays of the sun can take their toll on your vehicle. When you’re not driving your car, it’s best to keep it inside and away from harmful UV Rays. With this in mind, always try to park in a shaded area whenever available.
  1. Use A Recommended Protective Overlaminate
  • Protective overlaminates are formulated to provide your vehicle wrap with UV protection. Overlaminates act as an additional barrier from the sun. Read more about the importance of overlaminates HERE.
  1. Brush Off Dirt and Debris in Between Washes
  • In the summer months, dirt and airborne particles can be baked into the film, leaving a stain on the vehicle. This is most common in high volume traffic areas. The stain may appear as black dust or overspray but you will not be able to remove it from your vehicle. Always make sure to take a few minutes each day and brush off any particles that may have fallen on to your vehicle.
  1. Hand Wash Weekly
  • How often you need to wash your vehicle will vary based on your location. You’ll know it’s time to wash your vehicle when you start to see a build up that cannot be wiped off by hand. On hot days, we recommend hand washing with cold-water, preferably in a shaded area. Wash with automotive grade car wash soap and follow the recommended dilution.

When temperatures hit triple digits, your wraps need a little extra care. By following the steps listed above, you can keep your vehicle wrap looking brand new.

Share This:

Read More
Manufacturing Vehicle Applications

Tips for Handling Reflective Films

Reflective films are leading the wrap world in an exciting direction, and with no surprise, a product like this can sometimes bring about new challenges.

What is Reflective Film?

Reflective film is a type of film that is layered with an array of glass beads or prisms that reflects light back to the observer; the arrangement of these light-reflecting components has a direct effect on the film’s overall reflectivity. Our reflective films today are of the glass bead type and have the following cross section:

Reflective film technology


People are considering reflective films not only for additional brand awareness but for cut graphic lettering, decals, fleet markings, and vehicle and fleet wraps.

What is Bruising?

Reflective films have more delicate components in their construction. Keeping this in mind reflective products needs to be handled differently than other cast vinyl film. If a reflective film is mishandled it causes bruising. Bruising occurs when the uniformity of the reflective components is disturbed either by drastically stretching or creasing the film. Once bruising occurs, it can be very difficult to heal the film back to its original state.

IllumiNITE Wrap™ versus Leading Competitor Film

NOTE: The product on the top is Arlon IllumiNITE Wrap™. The product on the bottom is a leading competitive brand. Both products were subject to the same techniques to amplify bruising.

There are ongoing technological innovations that are proprietary to each vinyl manufacturer; Arlon’s latest innovation with FLITE Technology™ gives more power to the installer by providing ease of installation and efficiency.

Share This:

Read More
Vehicle Applications

Cold Weather Installation

Why does cold weather make cast vinyl difficult to install?

The winter months and colder temperatures create a multitude of problems for vinyl installers. Therefore it is important that we explain some of the physical characteristics of both the film and the substrate that are affected by these colder temperatures.
 
So what are the most common obstacles encountered during a cold weather installation?
  1. The vinyl can feel “stiff”’ and lose its ability to be easily conformed around curves and into recesses
  2. The adhesive can lose a great deal of its tack and won’t bond securely to the substrate’s surface.
  3. The ultimate bond level of the adhesive can take longer to be achieved.
  4. Condensation can form between the vinyl and the substrate, further impairing the bond level of the adhesive.

How can we overcome the effects of cold temperatures?

This is the eternal question that faces all manufacturers of vinyl films. The simple answer is to increase the ambient temperature of the installation environment, substrate, and vinyl. Only then will the film perform as we expect it to. So how is this achieved in cold weather installation?

Cold Weather Installation

A successful cold weather installation is more than achievable by following a few simple tips. This fleet vehicle is wrapped in DPF 6100XLP. (Wrapped by Elite Wraps UK)

The Installation Environment

The recommended ambient temperature of the installation area is between 59F – 95F (15C – 36C). Temperatures below this cause the film to become ‘stiff’ or ‘brittle’. Colder temperatures cause the plasticizers in the film to lose their elasticity. It is crucial that the temperature of the environment rises to the recommended levels. The vinyl will then regain its flexible characteristics. These temperature parameters also apply to the substrate. This may mean receiving the vehicle earlier. This will allow the surface temperature to assimilate with the environment. This will help prevent condensation, which will impair the adhesive bond. Placing IR or gas heaters around the vehicle can raise the ambient temperature of the installation area.

Warming the Substrate

Increasing the substrate temperature will also improve the bond between vinyl and surface. When the adhesive is cold, it remains hard and loses an amount of its initial tack. Then, the whetting out process is unable to occur. “Whetting out” refers to the effect of squeegee pressure and temperature, relative to the adhesive. Pressure softens the adhesive allowing it to flow and starts the process of bonding to a high level, and cold temperatures have a huge effect on this process. The low temperatures prevent the adhesive from activating effectively. Adding more squeegee pressure can also improve the adhesive bond during colder weather.

Vinyl and Adhesive

Increasing the temperature of the substrate, environment, and vinyl lessens the time the film needs to firmly adhere to the vehicle. There is no shortcut to this process. By increasing the temperature as explained above, the vinyl will be soft enough to manipulate around curves and recesses. The adhesive will be able to ‘wet out’ effectively. Post heating the entire vehicle will undoubtedly add time to the installation. But it will also ensure that the vinyl is adhering correctly.

Have you tried cold weather installation?

You have the power to conquer any installation, especially when you have control over your installation environment. What is your experience with cold weather installation? Tell us about your cold weather installation challenges in the comments!

Share This:

Read More
1 2 3 4 5
Translate »